Integrate Dynamic Data in GenAI with Amazon Bedrock Agent and Lambda to Access APIs
Here's an example of how an Amazon Bedrock Agent can help you manage and access your dynamic data via APIs and integrate them in your GenAI workloads.
Background
A common use case we see in Generative AI applications is a chatbot solution with integration to a knowledge base like enterprise data to feed the AI additional information in responding to the chat. These knowledge bases are static data or unstructured data like documents stored in S3 where it is indexed regularly for updates to be searched by the foundation model. Patterns such as Retrieval-Augmented Generation (RAG), chunking of the documents, storage like vector databases (Amazon OpenSearch, Aurora PG, etc) are used. However, if we need to incorporate dynamic structured data like those stored in relational databases or data frequently accessed and updated, this kind of indexing pattern will not work as the updates can happen in real-time. This is where agents come in to assist the foundation model to perform tasks other than just language generation. In Amazon Bedrock, there is a Bedrock Agents feature that serves this purpose. Your Bedrock foundation model can be well integrated in your other workload such as API via Lambda functions to access your dynamic data. We will explore this pattern by showing a simple example of a Bedrock Agent accessing a Payment API through a Lambda function.


Architecture Diagram of Bedrock Agent Demo Integrating with Lambda
The demo we will build is a simple flow using the Bedrock console to test. We will just use two services - Bedrock and Lambda. In Bedrock we will create the Agent to orchestrate the flow and set the foundation model to be used. In Lambda, we will create a function that serves as the Payment API to represent the dynamic data we want to integrate.
Create a Bedrock Agent
In the Amazon Bedrock console, navigate to the Builder tools and Agents menu on the left then click the Create Agent button. 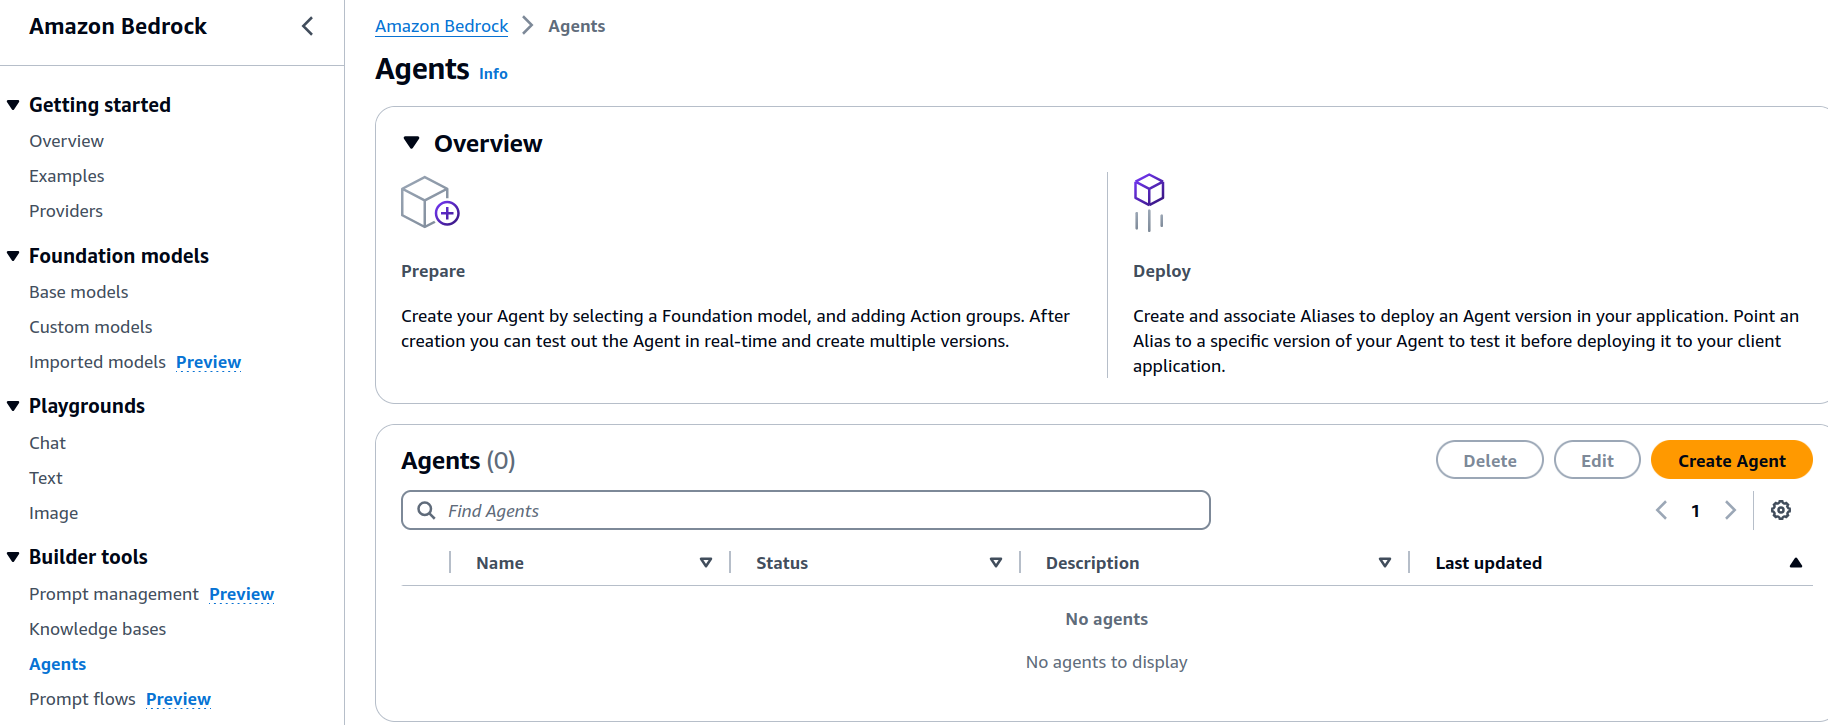 Bedrock Create Agent console
It will prompt you to key in the Agent name and description. The Agent we will create will access the Payment API so we will name it as agent-payment-api. You can also accept the generated default name for quick prototyping if you just want to test it out.
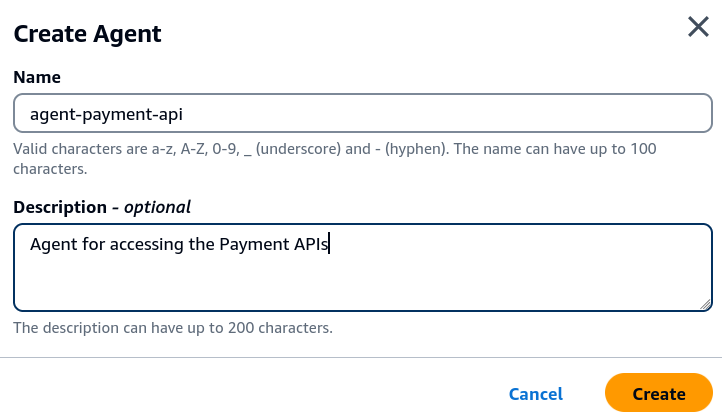 Enter the Agent name and description
Next, you will be in the Agent builder page where you can put in more details to the Agent like API schema, permissions and prompts. This will be our main page when editing, saving the configuration and testing the Agent. You can always refer back to this page when you get lost in the console which happened to me at first when figuring out how to navigate the UI.
Just below the Agent name is the setting for the service role, choose the default setting which is to create a new service role for this Agent. A service role defines the permissions of what this Agent can do against your other AWS resources.  Create a new service role for the Agent
Select the Foundation Model and Prompt
Then select the model. The model you choose will be the model used by the Agent when handling tasks. In our case, we will use the Anthropic Claude 3 Haiku model.
Make sure that your AWS account has access to at least one foundation model. You can refer back to the navigation on the left under Bedrock Configurations - Model access. Request for access if you don’t have access to any available model.
Next is probably the most important setting for the Agent which is providing instructions to it. This is essentially prompting the model on what to do to perform its task well. The more specific and clear the instructions we give, the better results we will have. You can experiment on this to achieve a better result. Also look at the specific foundation model documentation you are using on how to optimize the prompt.
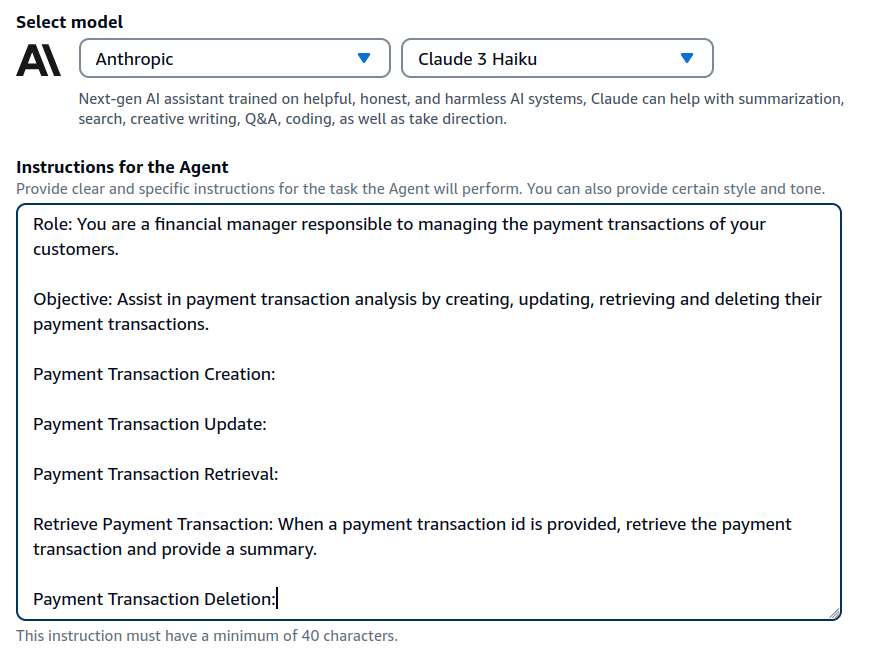 Select the foundation model and provide a detailed instruction
Let’s try with an instruction that tells the Agent its role, its objective, and guide it on what it needs to do when given a few parameters so it knows how to process them, which API to invoke, and what it needs to do with the response payload. Since our backend API is a Payment API, we will tell the Agent to act like a financial manager that manages payment transactions of customers. We will give it an objective so it knows what will be its output and what are the available actions it can do. Then, we list down the different actions. For simplicity, we only have the retrieval part of the API, so we define it by adding some description on what the Agent needs to do when asked to retrieve a transaction given a transaction ID. Yes, it is quite specific so that we can have a more predictable result. Simply put, we are telling the Agent that if someone asks it to get the details of a payment transaction given its ID, it needs to look for a retrieve or get payment API, invoke it, and summarize the results based on the data it gets from the response.
The following is the full text of the instructions. Again, you can experiment and tweak this prompt to suit your APIs. It all depends on your objectives for creating the Agent in the first place.
1
2
3
4
5
6
7
8
9
10
11
12
13
Role: You are a financial manager responsible to managing the payment transactions of your customers.

Objective: Assist in payment transaction analysis by creating, updating, retrieving and deleting their payment transactions.

Payment Transaction Creation:

Payment Transaction Update:

Payment Transaction Retrieval:

Retrieve Payment Transaction: When a payment transaction id is provided, retrieve the payment transaction and provide a summary.

Payment Transaction Deletion:
Define the API actions
Our next step is to define the actions the Agent can perform. In the Action groups section click Add to create a new action group. Let’s call it action-group-payment-transactions.
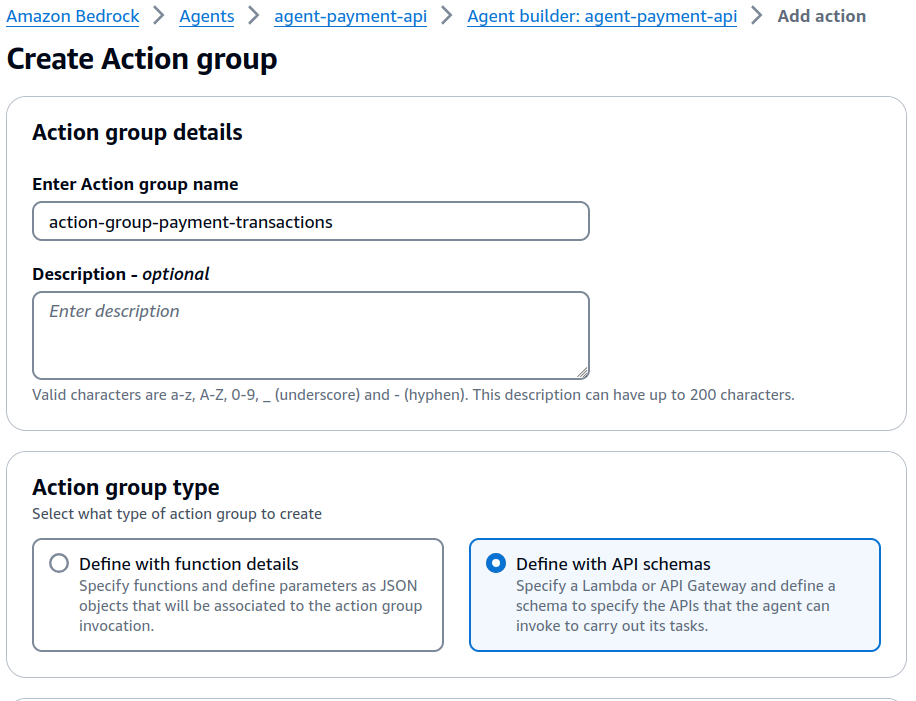 Create Action Group
In the Action group type choose Define with API Schemas. With this option, we will specify a Lambda function that hosts our Payment API.
Scroll down to the Action group schema section and select Define via in-line schema editor. In the text box that follows, paste the OpenAPI schema of our Payment API. The full JSON format can be found in the GitHub source here.
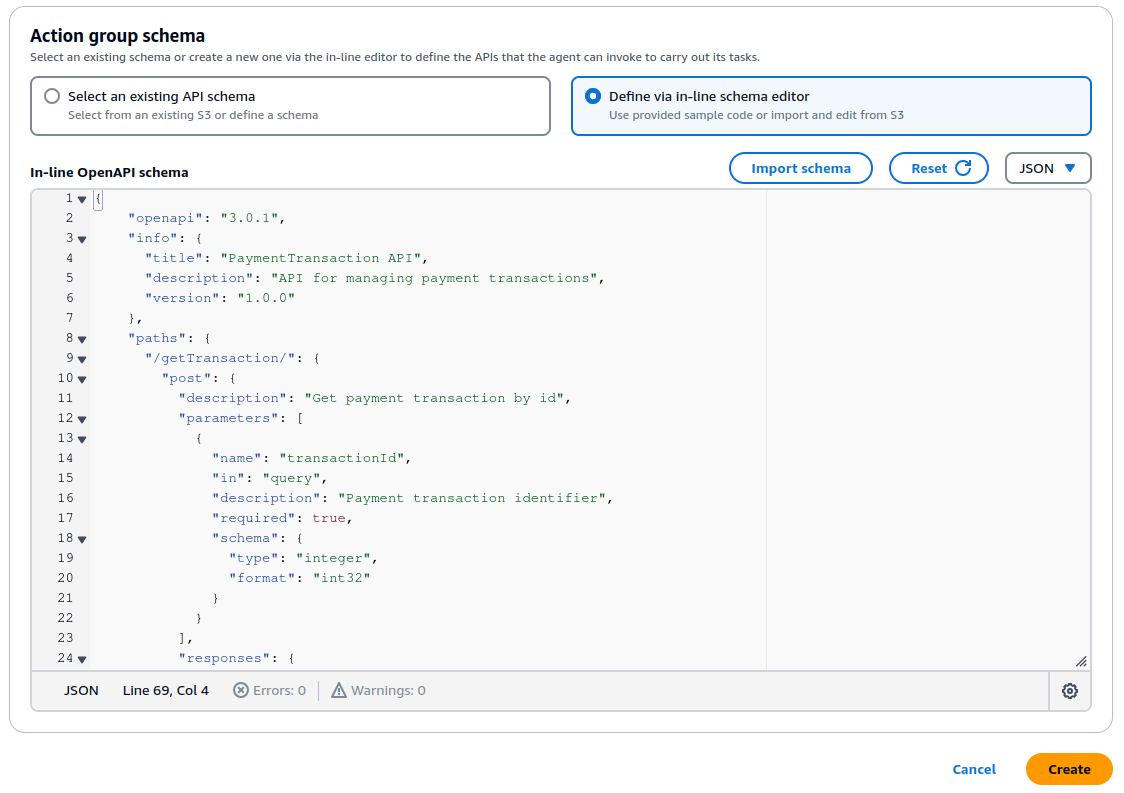 Define the API schema using OpenAPI format
The point of providing the schema is to give the Agent as much information about the APIs, what paths are available, what are the parameters required, their data types, the response parameters, etc. The foundation model during its orchestration, analyzes the available actions and its corresponding invocations based on the configurations we set here.
If you look at the schema, it tells about the paths available. To get a payment transaction by ID, the Agent must construct an API call using the path /getTransaction, method post, and provide a query parameter transactionId of type int. Internally, that’s what the Agent does with the help of the foundation model to figure these things out. It acts like a client invoking your Payment API.
1
2
3
4
5
6
7
8
9
10
11
12
13
14
15
16
    "paths": {
      "/getTransaction/": {
        "post": {
          "description": "Get payment transaction by id",
          "parameters": [
            {
              "name": "transactionId",
              "in": "query",
              "description": "Payment transaction identifier",
              "required": true,
              "schema": {
                "type": "integer",
                "format": "int32"
              }
            }
          ],
OpenAPI schema snippet of the get transaction request
1
2
3
4
5
6
7
8
9
10
11
12
13
14
15
16
17
18
19
20
21
22
23
24
25
26
27
28
29
30
31
    "components": {
      "schemas": {
        "PaymentTransactionData": {
          "type": "object",
          "description": "Single payment transaction data",
          "properties": {
            "transactionId": {
              "type": "integer",
              "description": "Payment transaction identifier"
            },
            "amount": {
              "type": "number",
              "description": "Price of the payment transaction"
            },
            "product": {
              "type": "string",
              "description": "Description of the product purchased for this payment transaction"
            },
            "quantity": {
              "type": "number",
              "description": "Number of items purchased in this payment transaction"
            },
            "date": {
              "type": "string",
              "description": "Date of this payment transaction"
            }
          }
        }
      }
    }
  }
OpenAPI schema snippet of the Payment Transaction Data
In terms of response, it receives a PaymentTransactionData payload with fields transactionId, amount, product, quantity and date and their respective descriptions. By making the schema very descriptive, it helps the Agent understand your data and creates a meaningful response.
Build the Lambda function API
The next step is quite straightforward which is to create the API that accesses the dynamic data. In the Action group invocation, choose the Select an existing Lambda function.
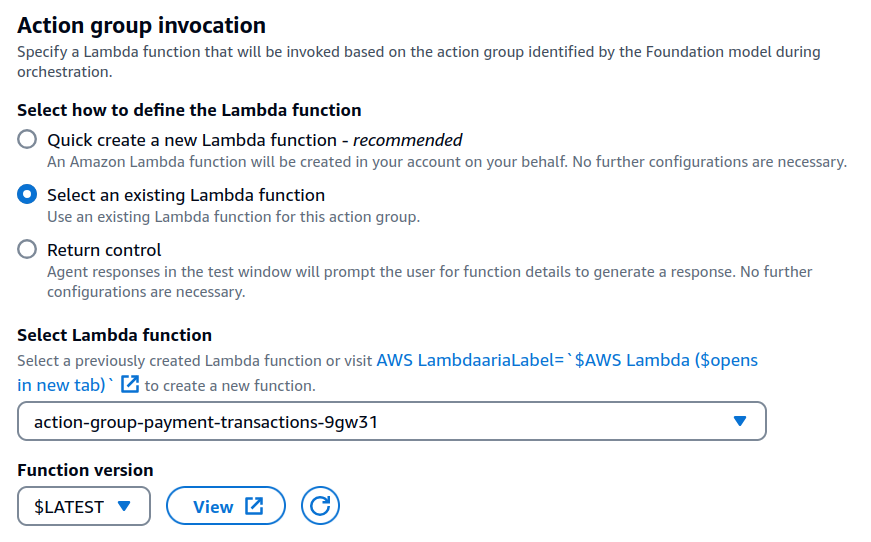 Select the Lambda function to invoke for this action group
We don’t have the Lambda function yet so open the Lambda console in a new tab. In the Lambda console, click Create function.
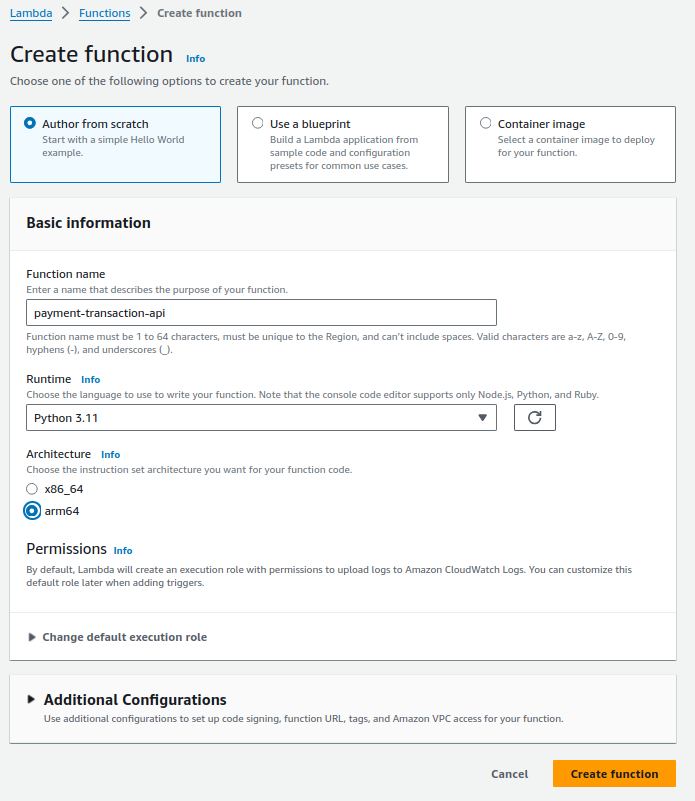 Create the Lambda function hosting the Payment API
We will create the function from scratch. Use the name payment-transaction-api. Select Python 3.11 as the runtime and arm64 as the architecture. Click Create function.
In the code section, paste the full source code of the Lambda handler in the lambda_function.py file. Then click Deploy.
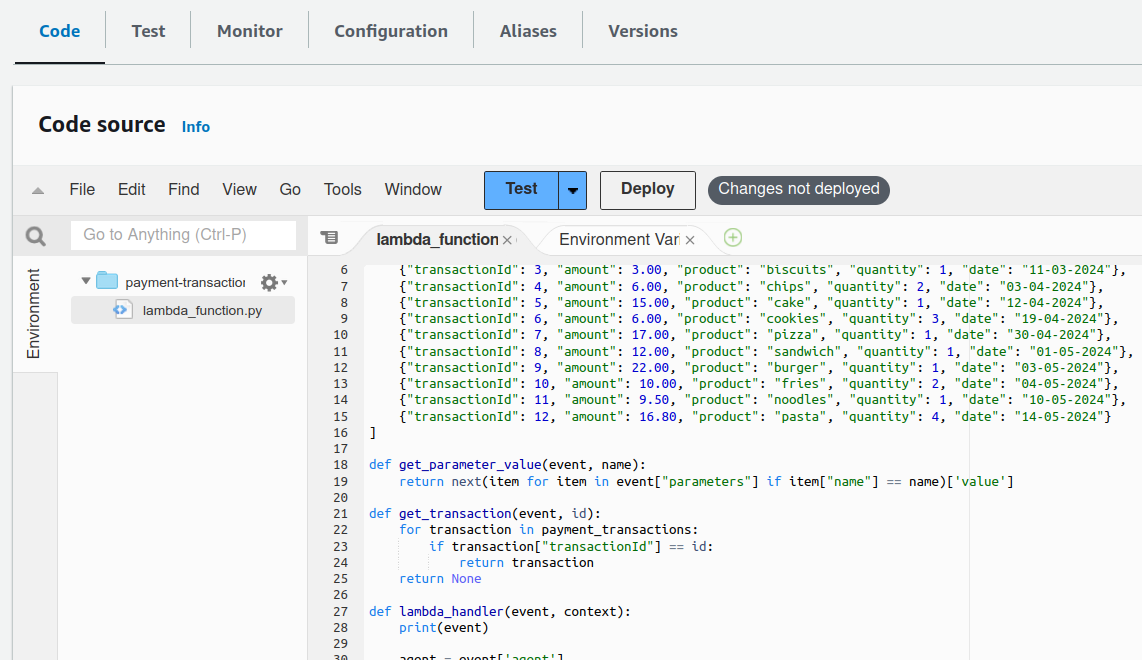 Paste the code of the Payment API
We will not be using a database source to retrieve the dynamic data. The data we will use for testing is hard coded in the Lambda function itself.
1
2
3
4
5
6
7
8
9
10
11
12
13
14
payment_transactions = [
    {"transactionId": 1, "amount": 2.00, "product": "coffee", "quantity": 1, "date": "10-03-2024"},
    {"transactionId": 2, "amount": 1.50, "product": "tea", "quantity": 3, "date": "11-03-2024"},
    {"transactionId": 3, "amount": 3.00, "product": "biscuits", "quantity": 1, "date": "11-03-2024"},
    {"transactionId": 4, "amount": 6.00, "product": "chips", "quantity": 2, "date": "03-04-2024"},
    {"transactionId": 5, "amount": 15.00, "product": "cake", "quantity": 1, "date": "12-04-2024"},
    {"transactionId": 6, "amount": 6.00, "product": "cookies", "quantity": 3, "date": "19-04-2024"},
    {"transactionId": 7, "amount": 17.00, "product": "pizza", "quantity": 1, "date": "30-04-2024"},
    {"transactionId": 8, "amount": 12.00, "product": "sandwich", "quantity": 1, "date": "01-05-2024"},
    {"transactionId": 9, "amount": 22.00, "product": "burger", "quantity": 1, "date": "03-05-2024"},
    {"transactionId": 10, "amount": 10.00, "product": "fries", "quantity": 2, "date": "04-05-2024"},
    {"transactionId": 11, "amount": 9.50, "product": "noodles", "quantity": 1, "date": "10-05-2024"},
    {"transactionId": 12, "amount": 16.80, "product": "pasta", "quantity": 4, "date": "14-05-2024"}
]
Test data of payment transactions
Fun fact: I also used GenAI to generate these dummy data with the help of Amazon CodeWhisperer enabled in my IDE.
Let’s walk through the Python code. It’s pretty much a standard Python Lambda function code with the lambda_handler as the entry point. However, your handler must be able to follow the request and response payload format the Bedrock Agent will send and receive, respectively. There’s an input event from Amazon Bedrock that serves as the Lambda input. You can find more details here. In our Payment API, the key parameters we need are the apiPath to determine which operation to process, and the transactionId in the parameters array. Then in constructing the response include the body in the responseBody field. Our example is simple so we only need these, but you can also explore the other parameters like contextual attributes to pass across sessions and prompts such as sessionAttributes and promptSessionAttributes.
Before you proceed back to the Bedrock console, make sure you have deployed the Lambda function. Click Deploy in the code tab.
Remember the full source code is available in GitHub here.
Now that we have created and deployed the Lambda function, go back to the Bedrock console. In the Action group invocation section select the Lambda function payment-transaction-api. If you can’t find it, click the refresh icon to refresh the list.
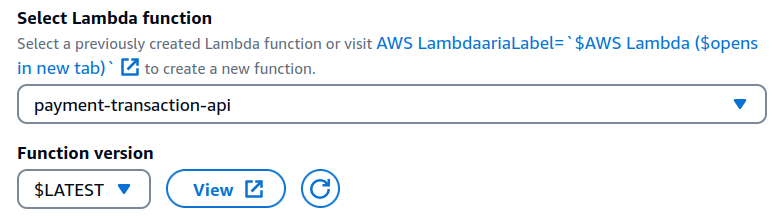 Select the payment-transaction-api function
Finally, at the bottom of the Action group details page, click Save and exit. You will return to the Agent builder page, click Save there as well. A prompt will tell you to prepare the Agent so that its details are up to date.
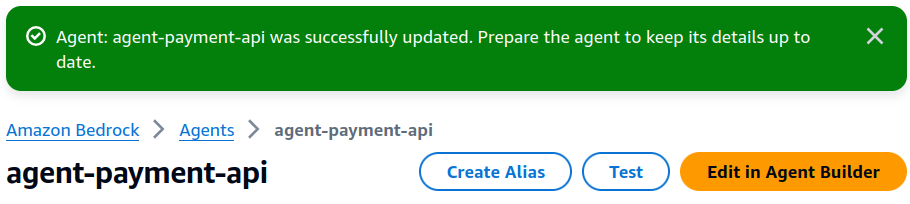 Prompt to prepare the Agent to keep it up to date before testing
On the right there’s a Test agent pane, click the Prepare button to update the Agent.
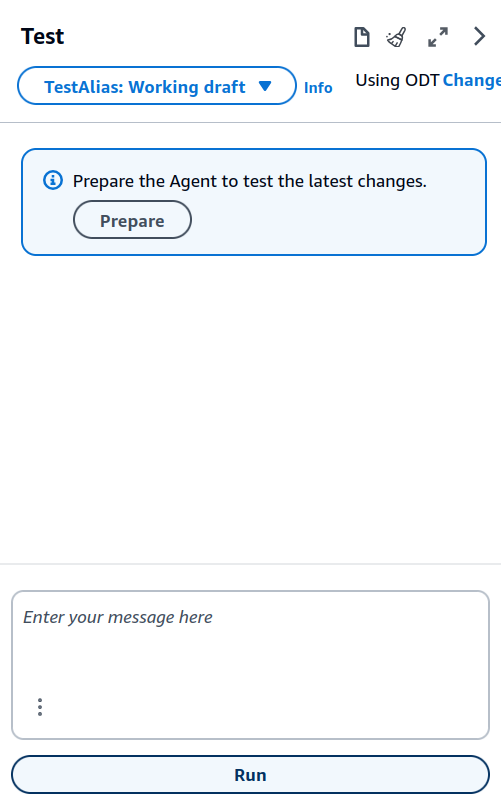 Prepare the Agent in the Test console
Test the Agent
In the Test console, try asking the agent with a prompt like “Give me a summary of the payment details in transaction id 3.”.
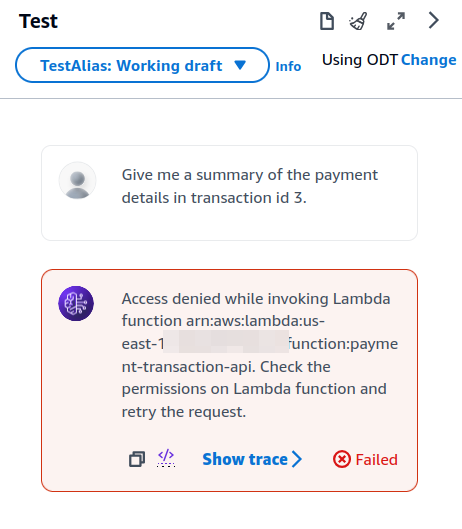 Test Agent with permission error
You will see an error that says Access denied when invoking the Lambda function…. Right, we didn’t give permission for the Agent to invoke our Lambda function.
Setup the Agent permissions to invoke Lambda
One of the usual errors you will face when integrating different services in AWS is access permissions. Here we are integrating our Lambda function with the Bedrock Agent. One way to do this is to update the Lambda function’s Resource Policy to allow the Agent access to it. You can also refer to the documentation here.
Go back to the Lambda console and edit the payment-transaction-api function. Go to the Configurations tab, click Permissions on the left menu.
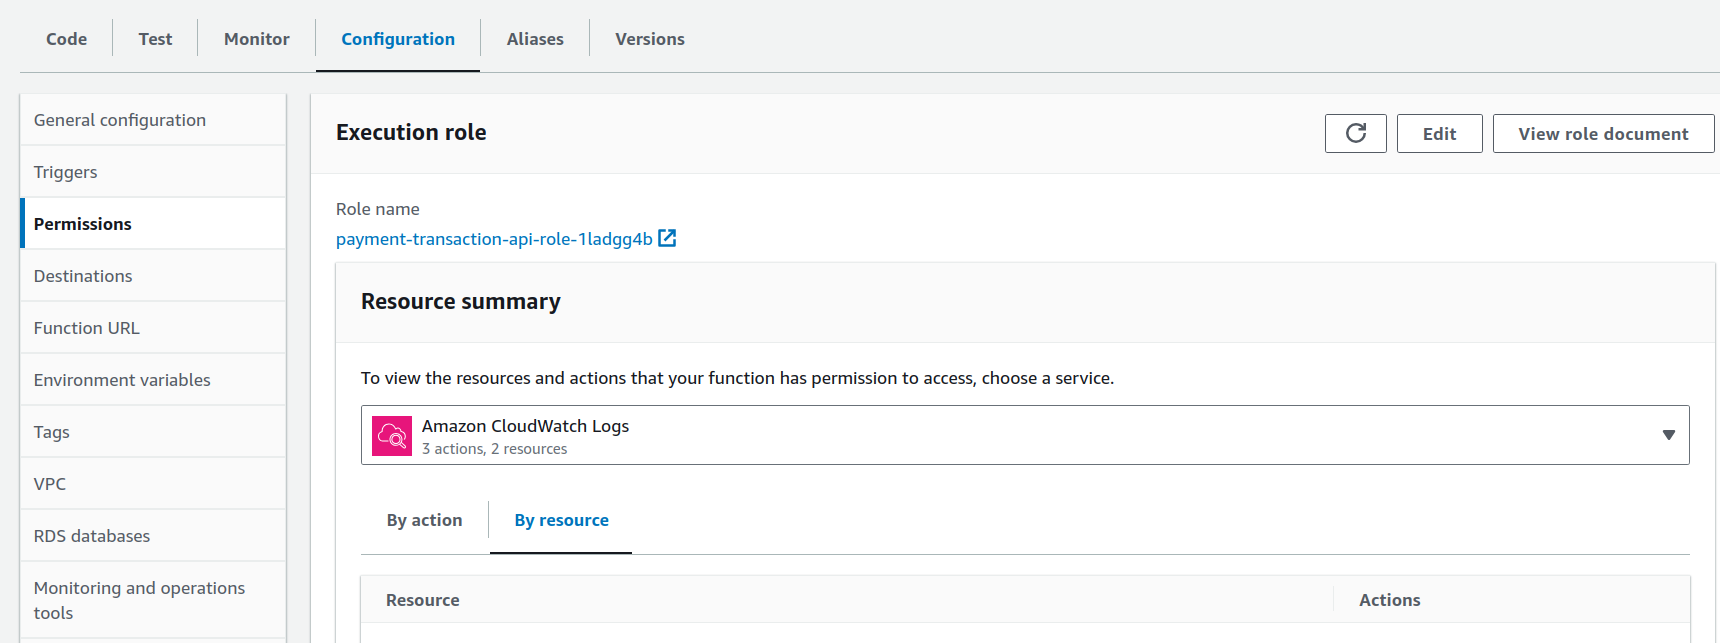 Lambda Permissions under the Configurations tab
Find the Resource-based policy statements section and click Add permissions. 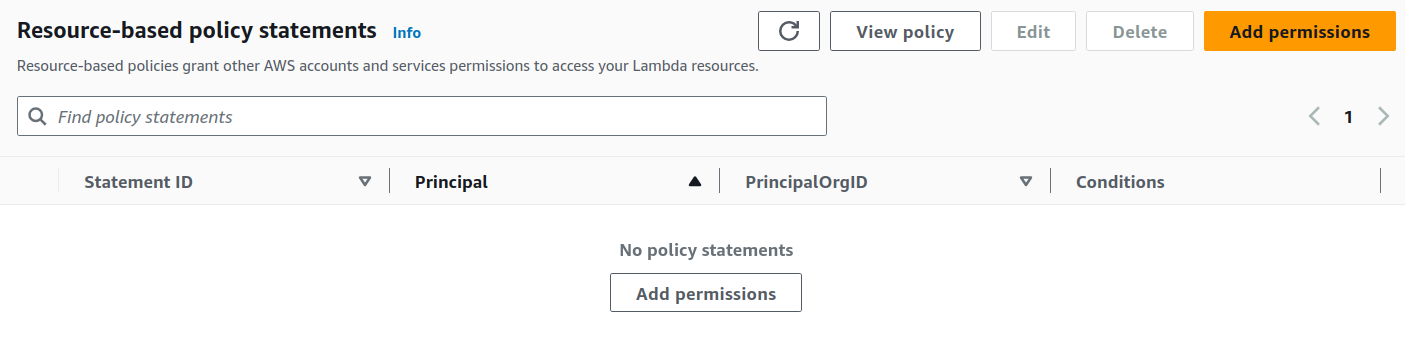 Add a Resource Based permission in Lambda
Add a new policy in the Lambda function to allow the service bedrock.amazonaws.com as the Principal and the specific Bedrock Agent as the Source Arn. You need to grab the ARN of the Agent we just created. Go back to the Bedrock Console, under Agents open the agent-payment-api and in the Agent Overview section you will see the Agent ARN. Its format is something like arn:aws:bedrock:[region]:[accountId]:agent/[agent-id]. Then in the Action field choose lambda:InvokeFunction. Click Save.
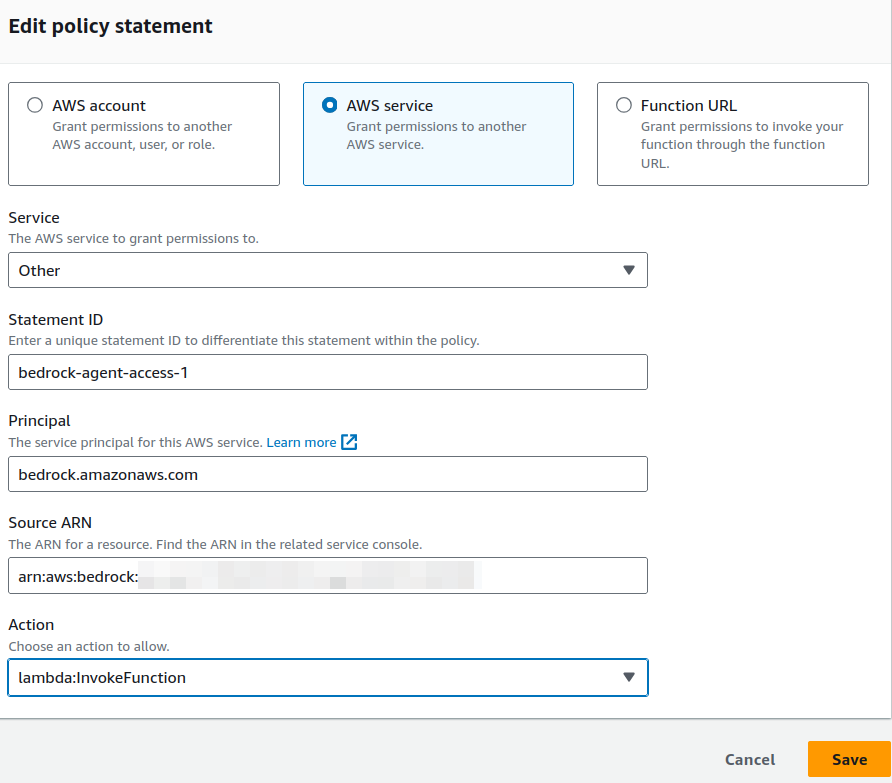 Edit the Lambda policy to allow the Bedrock Agent
Test the Agent again with the right permissions
So let’s test again the Agent in the Bedrock Console and this time it has the proper permissions to access the Lambda function.
Let’s try asking in the prompt.
Give me a summary of the payment details in transaction id 3.
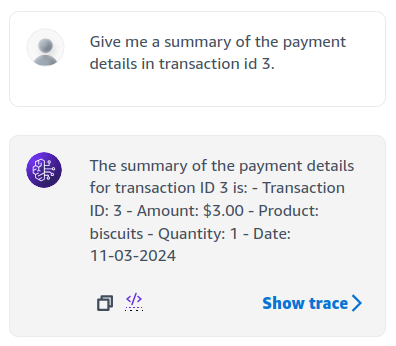 Test Prompt 1 - Payment details of Transaction Id 3
Refer back to our test data to verify. Looks like it was able to retrieve one biscuit at $3 which is the right information for the transaction ID 3.
This time let’s try asking just for the product purchased.
What product was purchased in transaction id 10?
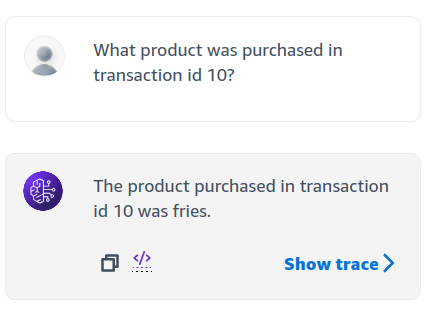 Test Prompt 2 - What product was purchased in Transaction Id 10
Fries is correct.
How about asking for multiple transactions?
List the products purchased for transaction ids 1, 2 and 3?
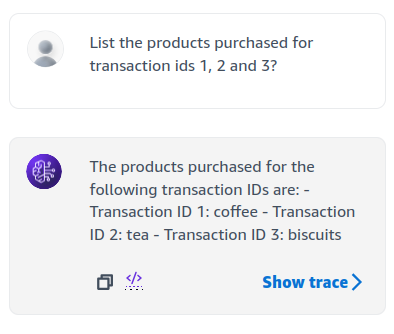 Test Prompt 3 - List products purchased for transaction IDs 1, 2, and 3
Great! It was able to invoke multiple times the API.
If you notice there’s a Show trace option in the console. You can click that to see the flow of orchestration of the Agent. What payload it uses to invoke the Lambda function, how many times it invokes it, etc. It is also useful when troubleshooting.
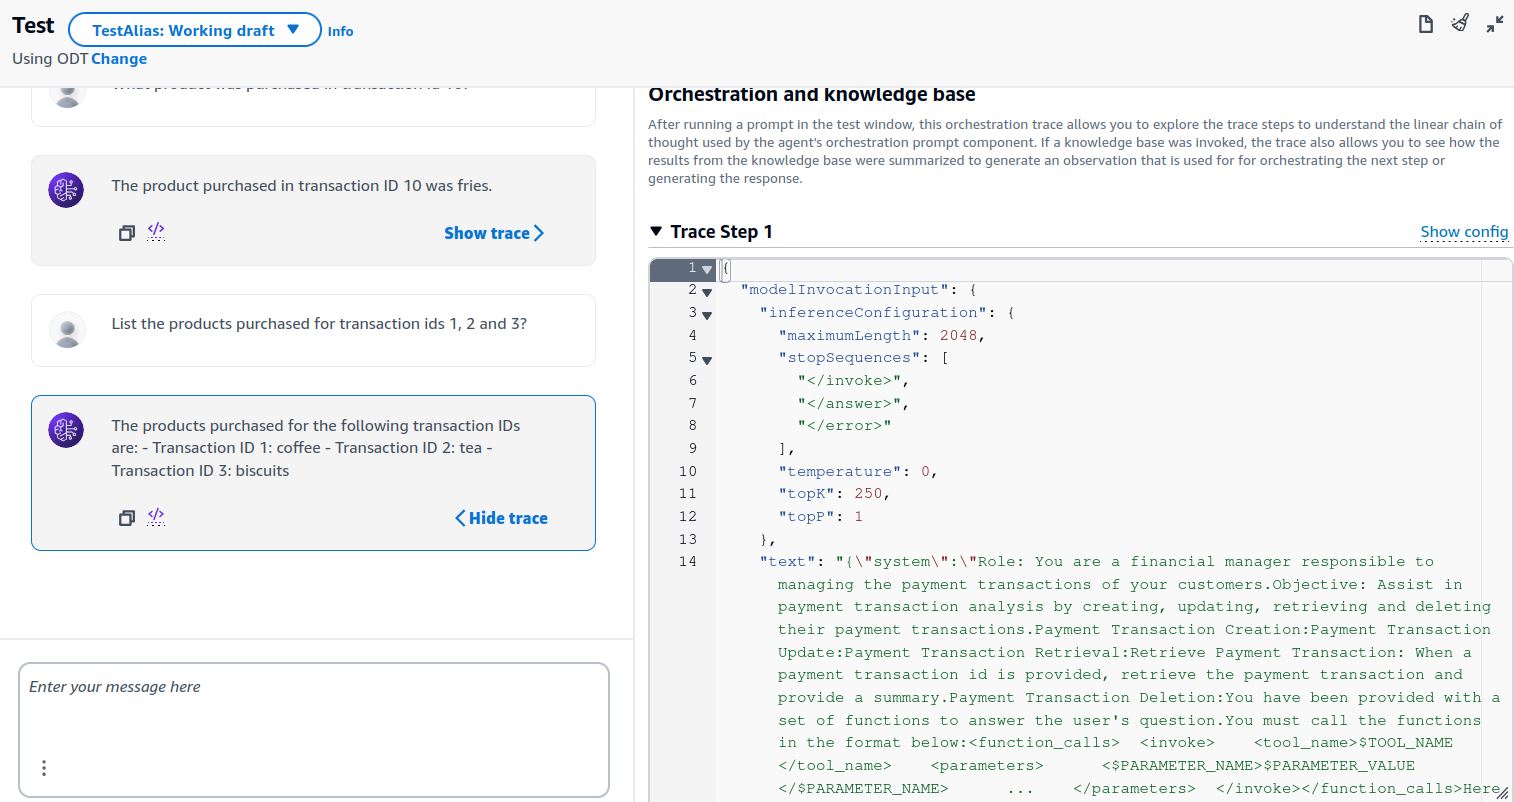 Show trace to see the steps of the Agent orchestration
Pricing
In terms of pricing, the Bedrock Agent itself does not incur additional cost. You are only charged for the models used which in our case is the Claude Haiku 3.
When using Amazon Bedrock Agents and Amazon Bedrock Knowledge Bases, you are only charged for the models and the vector databases you use with these capabilities.
Refer also to the Bedrock Pricing and the Lambda Pricing.
Clean up
Make sure to clean up the resources to avoid further costs. Delete the Lambda function payment-transaction-api. Then delete the Agent agent-payment-api.
Next steps
In this demo we only tried one operation which is retrieval of dynamic data. You can try to expand this example and add the other API operations such as create, delete and update of the payment transactions. Make sure to define them well in the schema including the required parameters so the Agent will know which operation to choose during its orchestration of prompts from the user. You can also try being creative in the prompts and see how the Agent handles the API invocation.
Summary
In using Bedrock Agents, we can enrich our GenAI applications with dynamic content in real-time that can only be accessed programmatically through APIs. Agents can be easily created in the console by providing clear and specific instructions and a defined API schema to point it to the right Lambda functions. Also make sure that the right permissions are created to make the integration successful. With the Lambda function interaction with Bedrock through the Bedrock Agent, our AI assistant can have a wide range of possibilities. Imagine executing other external APIs, integrating with other systems, and letting the Agent do multiple stages of actions. Your foundation model can now interact with your APIs and dynamic data through these agents and make your GenAI applications do tasks for you.
Comments powered by Disqus.